
(Wow, Samsung DEX, nice)
My PC is not around recently, so it is a problem to update my blog. I have to use ssh to connect to my PC located at my home, and use vim or remote desktop, and run hugo deploy. It’s not elegant, so I need to come up with a better solution.
It’s enough to edit markdown with my Android tablet(use Spck Editor APP(not ad :) , or code-server in Termux native), so the problem is how to run hugo --minify && hugo deploy. Well, Termux navtive can do hugo server and hugo --minify, but here is no google-cloud-cli.(updated it does have)
So, let’s look at Github Actions. It’s really powerful and convenient😍.
Create Github Actions #
In the repository page, select Actions, create a new workflow
name: hugo auto deploy

# When
on:
  push:
    branches: [ main ]

# env
# google-github-actions needs the permissions.
jobs:
  setup-deploy:
    name: Setup and Deploy
    runs-on: ubuntu-latest
    permissions:
      contents: 'read'
      id-token: 'write'
    steps:

# checkout and get submodule
    - name: Checkout
      uses: actions/checkout@v4
      with:
        submodules: true

    - name: "google-cloud-login"
      uses: 'google-github-actions/auth@v2'
      with:
        credentials_json: '${{ secrets.GOOGLE_CREDENTIALS }}'

    - name: "setup cloud sdk"
      uses: 'google-github-actions/setup-gcloud@v2'

# hugo env
    - name: Setup Hugo
      uses: peaceiris/actions-hugo@v3

# hugo compile and deploy
    - run: hugo --minify
    - run: hugo deploy
Configure Google Cloud #
If you have just triggered Actions directly, an error will be reported in the log as expected. Now, let’s fix the error step by step.
Generate Google Cloud Service Key #
Go to Google Cloud Console, enter IAM&Admin,select Service accounts, and CREATE SERVICE ACCOUNT
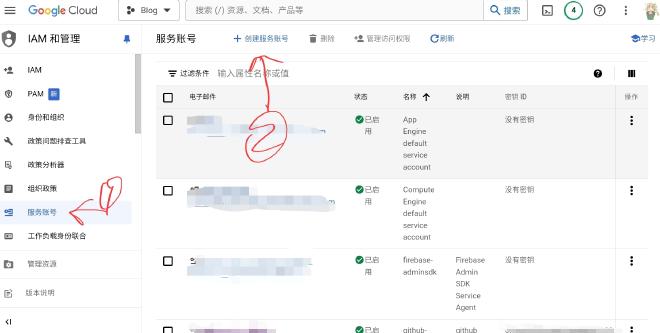
github-actions, service account id will generate automatically, click CREATE AND CONTINUE. After that, select the account that you have created, and selsect Manage keys
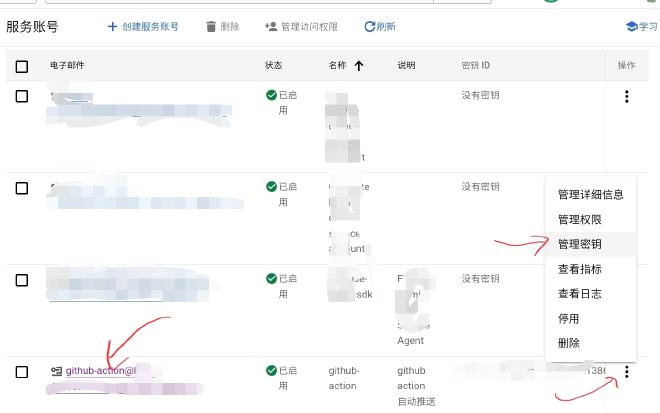
ADD KEY, Create new key, select JSON, and CREATE. You will get a JSON file. Be careful in case of losing it.
Grant Access Permission #
Enter PERMISSIONS, click GRANT ACCESS,New principals is what you have just created. Assign role with Storage Object Admin.
Configure Github Actions Secrets #
Back to Github, enter Settings in the repository. Select Secrets and variables, select Actions, click New repository secrets,Name is GOOGLE_CREDENTIALS,Secret is the content of JSON that you have just got from Google Cloud. Just copy all content into it.
Try Actions Again #
It would done successfully now.